


Our wet bar renovation is finally complete and I’m so pleased with how it came out. Let me first insert a reminder of what it used to look like.


I know, yikes! I called it my Scarface wet bar because of the mirrors. The first thing I did when we moved in was just remove the mirrors and shelves, repair the drywall, and texture and paint. It stayed that way until recently, when I decided to come up with a plan to refresh this area again.


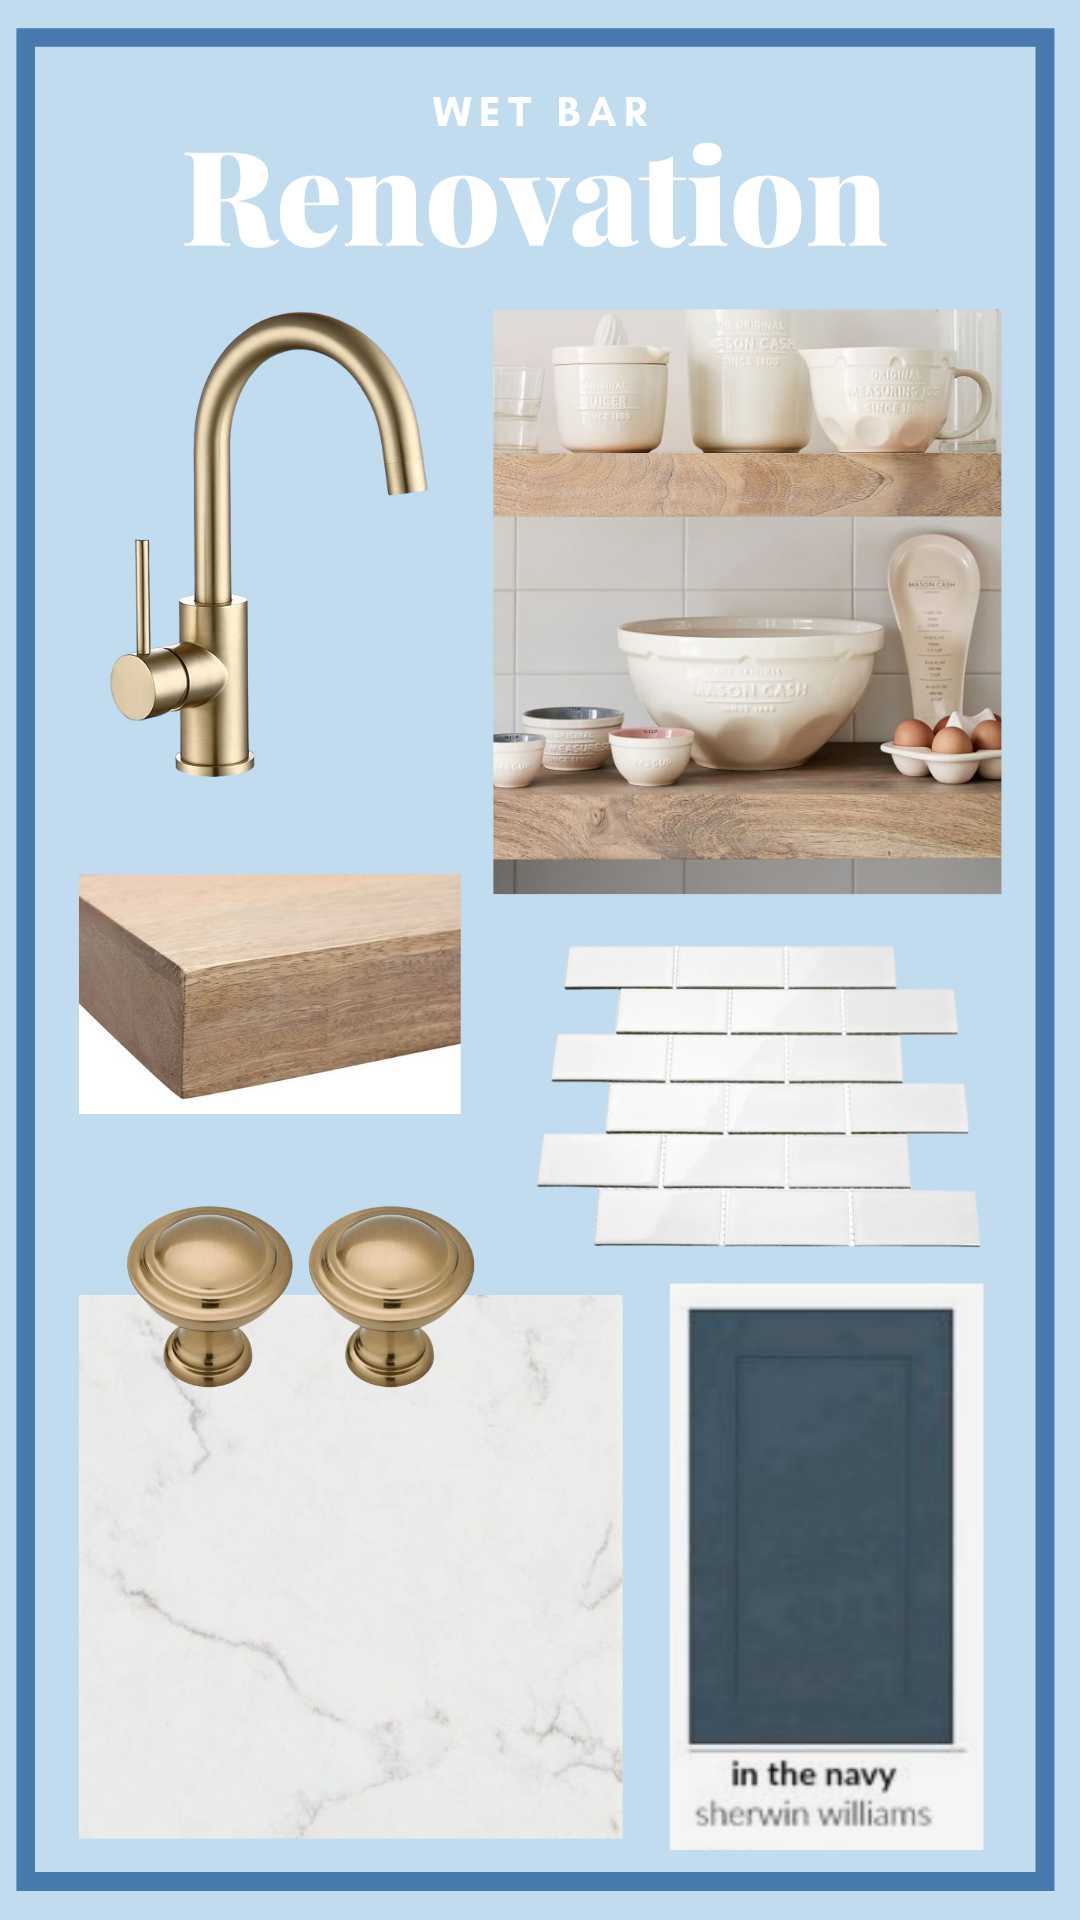
The countertop and old sink was removed and replaced with a newly fabricated quartz remnant our counter top fabricator had on hand. This cut the cost of the quartz since it was a piece that was left over from another installation. I purchased a prep sink from Amazon along with the faucet. Once the counter top and sink was installed, I began working on the cabinet base. I wanted to paint the cabinets but was unsure if I should roll or spray the cabinet doors. I ended up just spraying the cabinet doors with my Wagner Spray Tech Flexio 3000. I decided to use Sherwin Williams In the Navy and the color shade was perfect! Not too dark, not too light, it was just right! Afterwards I added cabinet hardware which the cabinets didn’t have before. I went with brushed brass to match the faucet sink.
The Process
Once the cabinets were painted and the hardware was on, it was time for the tile and shelves to be installed. I really wanted to carry in the subway tile that we used in our kitchen renovation for visual continuity. I had never tiled before, and so I decided to use Musselbound for this small project instead of regular tile adhesive. My walls have an orange peel texture to them so I was unsure if I was going to have trouble with the Musselbound staying adhered to the wall, but It performed better than I thought it would. I wouldn’t recommend it for highly textured walls, but it worked with my light orange peel walls. You can check out the progress here. I used a 1/4 tile edge on one side of the wall to give it a more finished look.


The shelf was another thing that I had never built and was quite nervous to tackle but in the end it worked out really well. I purchased a floating shelf bracket from Shelfology and built the shelf around it with 1/4 birchwood. I’m so proud of myself, it was my first time actually building something. You can check out my progress here. The last thing was moving the light fixture from the ceiling to right above the bar. I hired an electrician to do that, but I was able to pick out the a brass wall arm sconce that really finishes off the space.
Materials List
- Brass Knobs (2 knobs)
- Brass Pulls (2 pulls)
- Musselbound (1 roll)
- Subway Tile (pieces)
- 1/4 inch Tile Edge
- Shelfology 10’ Shelf Bracket (1)
- 1/4 inch Birch Project Boards (2)
- 1 Quart of Sherwin Williams Urethane Paint in In the Navy
- 1 Quart Polyurethane Primer
- Gold Faucet
- Bar Sink
- Polyblend Unsanded Grout in Platinum
- Polyblend Grout Caulk in Platinum
- 220 grit sand paper
- Diablo Orbital Sander Sandpaper in 150 grit and 120 grit
- Drywall anchors
- Wall Arm Sconce
FAQs for Wet Bar
How much was the overall cost?
Everything was under $1500. Outsourcing the work for the electrician to move the lighting and the counter top fabrication and install took up the majority of my budget. I could have chosen to go with a butcher block for the counter top that I would have been able to install myself. That would have been a lot cheaper and saved me much more money.
Does the Mussel Bound really work?
I would say it works best on a smooth wall surface. If your walls are even a bit textured, the Musselbound will have trouble sticking to the wall. This is what happened in my case. I do love the product, but on a smooth wall surface.
Do I have to use a paint sprayer to paint the cabinets or can I roll them on?
The Sherwin Williams Emerald paint is perfect for rolling on. It’s self leveling, so you don’t have to spray it on if you don’t want to.
Do I absolutely need a miter saw?
You don’t have to have a miter saw especially if you aren’t making your own shelf. I used my miter saw for my cuts, but a table saw will also work just fine.
This project is completely doable for a beginner DIYer like myself. I really love how our wet bar came out. Don’t forget to check out my other DIY projects on my DIY page and shop all my DIY favorites within the LiketoKnow.it app.


comments
0
Share this post on: